
How to get professional looking GoPro footage for FREE
Check the latest price, confirm compatibility with your setup, and then read our full hands-on review.
Quick verdict on the How to get professional looking GoPro footage for FREE
Quick summary
We have all been there when it comes to buying a GoPro Hero camera. You get all excited…rip it out of the box…go take your first video…and it looks like junk. Where is this epic video you are used to seeing in the commercials. Why does mine not look like that? It can be discouraging and I have actually seen people not use their new camera because they were not…
We have all been there when it comes to buying a GoPro Hero camera. You get all excited…rip it out of the box…go take your first video…and it looks like junk. Where is this epic video you are used to seeing in the commercials. Why does mine not look like that?
It can be discouraging and I have actually seen people not use their new camera because they were not able to get solid results. We are here to change that today. You can get awesome looking GoPro footage without spending another dime. It just takes some settings tweaks and a little bit of work.
Over at Bike198.com, I use a lot of POV footage for my videos and content. This is how I get professional looking GoPro footage…no matter what the conditions…without having to spend money on anything extra.
GoPro Hero Settings for Pro Looking Footage
A lot of the reason your footage does not look like the commercials is because of your settings. The stock settings on the GoPro Hero‘s sharpen too much, boost saturation and vibrancy too much, almost always miss white balance and when you combine all of those…it looks terrible on screen. Here are the settings that you should start out with on your GoPro to get pro looking footage.
Pick any of the options (I do Cinematic) and go into the settings to start to edit.
- Resolution – 4k 24fps
- Lens – SuperView
- HyperSmooth – Boost
- Low Light – N/A
- Zoom – 1.0x
- Bit Rate – High
- Shutter – Auto
- EV Comp – -1.0
- White Balance – 5500k
- ISO Min – 100
- ISO Max – 3200
- Sharpness – Low
- Color – Flat
- RAW Audio – High
- Wind – Off
So there are several things going on here. You are basically trying to get the GoPro to record in the largest file size possible with the flattest picture profile. We want the GoPro to not self process any of the footage. With the Bit Rate at high, the color profile at flat and the resolution at 4k…we are able to capture as much data as we can to preserve highlights and shadows for when we import the footage and start to work with it on our computer.
Also, if you are like me and do a lot of POV footage in windy conditions, you are better off ordering these “dead cat” sticker off of Amazon to put over the mics. That gets rid of the wind noise because the wind noise setting really messes with the audio.
How to edit GoPro footage like a pro for FREE
Here is where we get into the part that makes your GoPro footage really look more professional and not like what you first saw out of the box. It will require a little bit of work but it is very easy to do and you do not have to spend money to get it done.
Davinci Resolve Studio – Free Editing Software
For those of you that don’t know about Davinici Resolve…it is the PREMIERE color grading software in the pro industry. There are a ton of professional production houses that will edit in another software like Adobe Premiere Pro and then do their color grading (color editing) in Resolve. They have been the standard for a long time.
Here is the best part. The free version of the software has everything you need to color grade and edit your footage. It is quite amazing actually and I actually used it for quite awhile for all of my editing. There is not a better free option on the market and it is actually a lot better than some paid options. You can download it here.
Color Grading Your GoPro Footage
I am not going to get into editing techniques for the purpose of this tutorial so we are going to just jump straight into the color grading.
Import your footage into Resolve and drag it to the timeline. You are then going to the color tab at the bottom to start color grading your footage. When you first look at the clip, it is going to look flat…we are about to change that.
First step…make sure you have your scopes visible (workspace -> videoscopes -> on). That will open up a window with some graphs. I like to have the Parade and Waveform open to get started. Select the clip and let’s get started.
Setting Exposure/Shadows/Highlights/Mid Tones
The 3 wheels we want to be concerned with are the following:
- Lift – Controls the darks/shadows
- Gamma – Controls mid tones
- Gain – Controls the highlights
Let’s start with Lift. By using the wheel at the bottom, we want to adjust the lift until our graphs pull up to just above the bottom. This is all of the data for our shadows. We want to make sure there are no absolute blacks that would be data we are missing.
Now we are going to do the same thing with the gain. We want to drag it down so we are not losing any of our highlights. Since we recorded at the highest possible bit rate and on the flat profile, you will notice that you are actually recovering areas of the video that were previously blown out white.
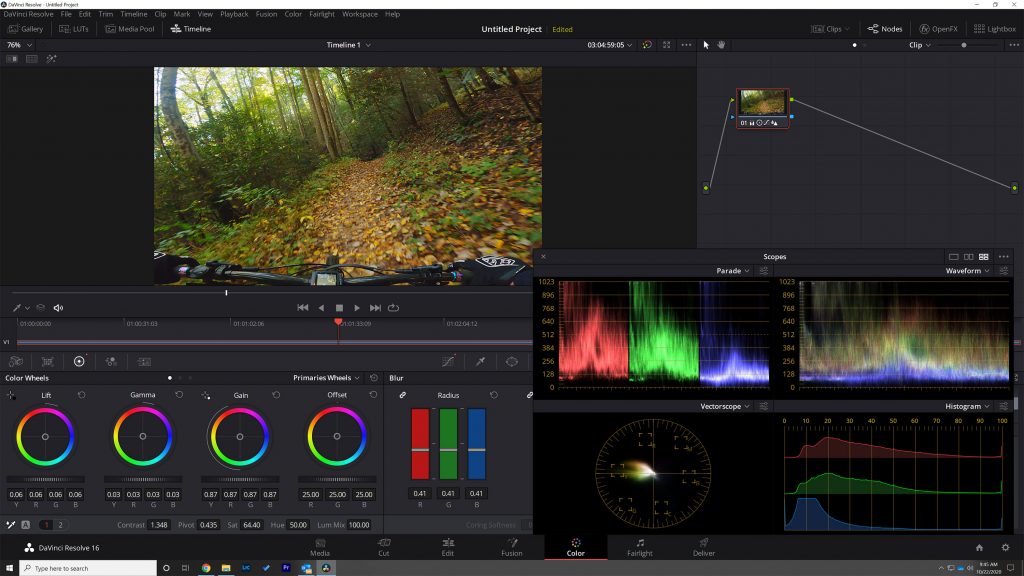
Now we go to Gamma and this can come down to personal preference on the scene. I typically like more contrast so I like to pull it down some but it changes with what I am recording. Play with that setting some to see what works the best.
Next, I pull contrast and saturation up. Again, depends on the scene but I try to get it to the point where it looks exactly like I remember seeing it in person.
If you look at your Parade graph, that is also your white balance indicator. In a perfect world, correct white balance would have all 3 graphs even. I find that to be a great starting point but sometimes it does need to be adjusted depending on what you recorded. You can use the dropper in the bottom left of the screen to set a starting point on a neutral grey.
And the last step…go over to the blur tab and pull down the radius sliders to add just a little bit of sharpening.
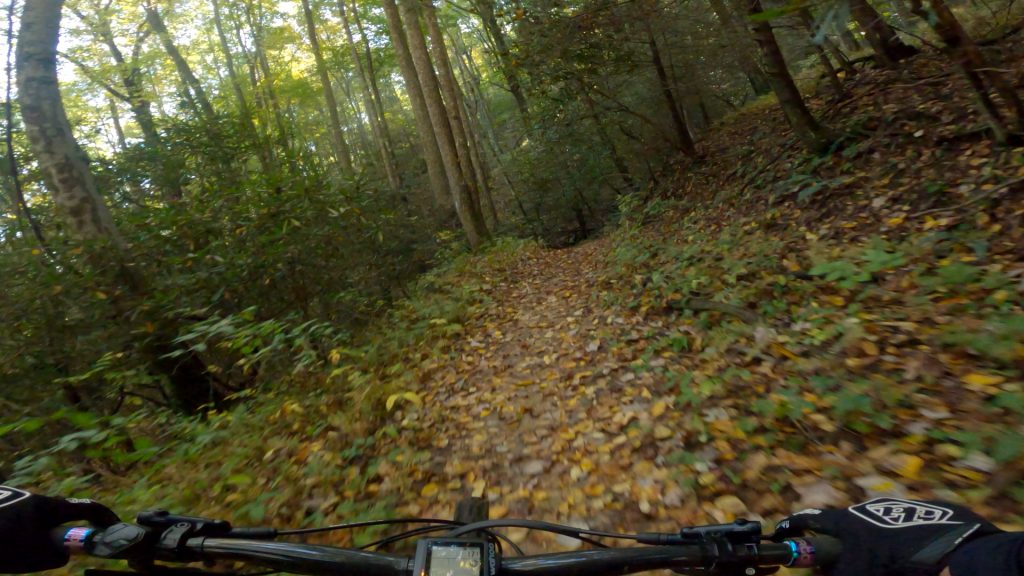
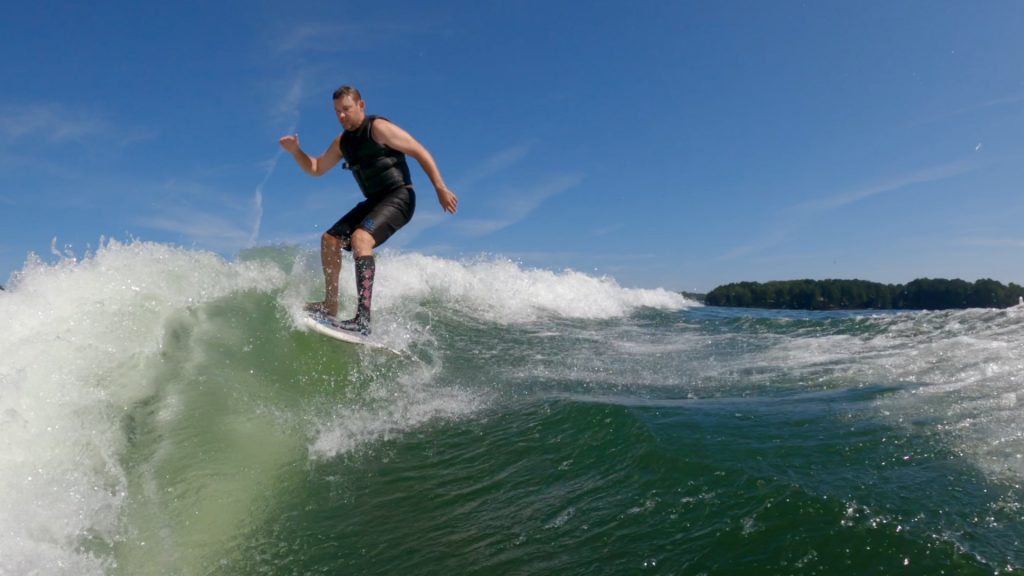
GoPro Footage Before Color Grading
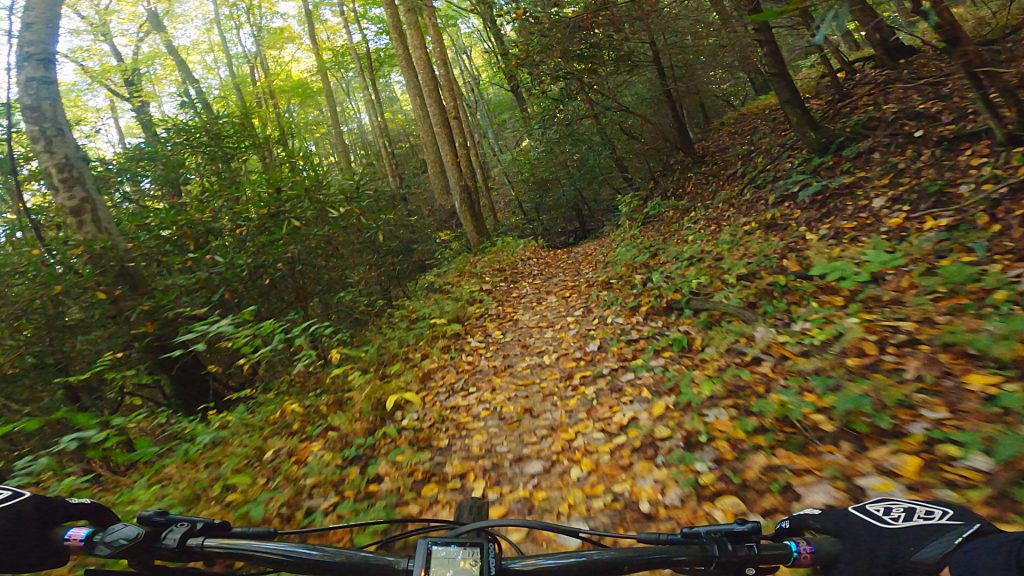
GoPro Footage After Color Grading
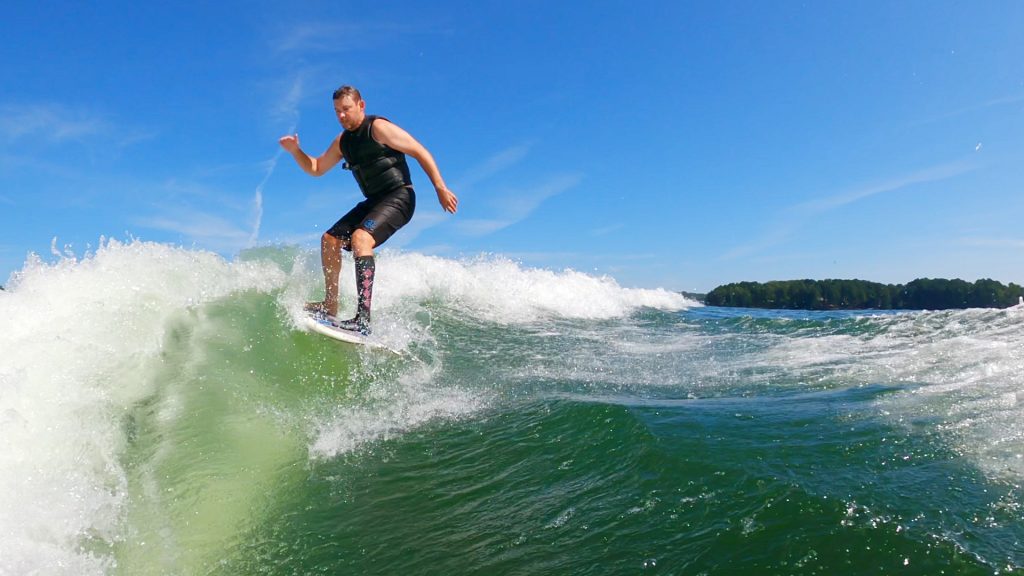
GoPro Footage Before Color Grading
GoPro Footage After Color Grading
And there you have it…follow those steps for your GoPro footage and you will get a lot better overall result.
Side Note: FPS Settings
As a general rule, 99% I only run 24 fps. There is motion blur that makes the video look a lot more natural at 24 fps. ONLY run slow motion if you absolutely need slow motion footage. I have found that there is rarely a time in POV footage when you need super slow motion (the jumping into the water ones are always fun).
Frequently asked questions about the How to get professional looking GoPro footage for FREE
What is How to get professional looking GoPro footage for FREE and what does it do?
Who is How to get professional looking GoPro footage for FREE best for?
What are the main downsides of How to get professional looking GoPro footage for FREE?
Should you buy the How to get professional looking GoPro footage for FREE?
If this review helped you decide, using our link is the easiest way to support future testing and keep the site running.