

1. Introduction: The Technical Threshold of Professional Content
In the contemporary digital landscape, the distinction between “user-generated content” and “professional broadcast” has largely dissolved, not due to a lowering of professional standards, but because the tools of cinema have become accessible to the prosumer market. However, accessibility does not equate to mastery. As the barrier to entry lowers, the “noise” in the market increases, making production value—specifically the triad of lighting, audio fidelity, and environmental design—the primary differentiator for viewer retention and channel authority.
A professional YouTube studio setup is not merely a collection of expensive hardware; it is a meticulously engineered system where physics, electronics, and aesthetics intersect. The objective of this report is to deconstruct this system for the technical creator. We move beyond the superficial recommendations of “buy this light” to explore the underlying principles of photon dispersion, acoustic wave propagation, and signal-to-noise ratios. By understanding the why—the physics of soft light, the mechanism of dynamic transducers, and the behavior of standing waves—creators can make informed decisions that transcend marketing hype.
This comprehensive guide targets the “Technical Director” persona inherent in every serious solo creator. It assumes the reader is operating in a constrained environment, such as a spare bedroom or home office, and seeks to maximize production value through engineering precision rather than unlimited budgets. The analysis draws upon extensive market research and technical reviews to provide a definitive roadmap for building a studio that meets 2025 broadcast standards.

2. The Physics of Illumination: Mastering the Photon
Lighting is often misidentified as a tool for exposure. In a professional context, exposure is the bare minimum requirement; the true purpose of lighting is modeling—the creation of three-dimensionality on a two-dimensional plane. To achieve the “cinematic” look coveted by creators, one must first master the physical laws that govern light behavior.
2.1 The Inverse Square Law and Spatial Management
The most critical concept in studio lighting, particularly in small spaces, is the Inverse Square Law. This physical law states that the intensity of light radiating from a point source is inversely proportional to the square of the distance from the source.1 Mathematically expressed, intensity ($I$) approximates as $I \approx 1/d^2$.
This has profound implications for the home studio:
- Fall-off Control: If a light source is placed 2 feet from a subject, and the background is 4 feet away (double the distance), the background receives only 1/4 of the light hitting the subject. This rapid “fall-off” is the secret to achieving a black or dark grey background even in a white room. By positioning the key light close to the talent, the relative distance to the walls increases, naturally separating the subject from the environment.3
- Subject Consistency: Conversely, if a light is placed too close, minor movements by the talent (leaning forward or back) result in drastic exposure changes. A subject moving from 2 feet to 1 foot away from the light source experiences a 400% increase in brightness. If the light is placed 6 feet away, a 1-foot movement results in a negligible exposure shift.4
Operational Insight: In a small spare room, the challenge is balancing fall-off with consistency. The optimal placement for a key light is typically as close as possible to the frame edge without entering the shot, usually 3-4 feet from the subject. This maximizes the softness of the source (relative size) while maintaining enough fall-off to darken the walls behind the creator.1
2.2 Chromatic Fidelity: CRI, TLCI, and SSI
For years, the Color Rendering Index (CRI) was the benchmark for light quality. However, CRI is flawed for video production as it relies on human color perception of eight pastel swatches and does not account for the specific spectral sensitivity of digital camera sensors.5
The Shift to TLCI (Television Lighting Consistency Index):
Developed by the European Broadcasting Union, TLCI models the spectral response of a standard 3-chip camera setup. It is a far more accurate predictor of how skin tones will render on video.
- The “Green Spike” Phenomenon: Inexpensive LED lights often exhibit a spike in the green spectrum and a deficiency in the R9 (deep red) spectrum. To the human eye (high CRI), the light looks white. To a camera sensor (low TLCI), the skin looks sickly or zombie-like.6
- Standardization: A TLCI score of < 85 requires significant post-production grading. A score of > 90 is considered “broadcast ready.” For 2025 standards, creators should aim for TLCI > 95 to ensure skin tones look natural straight out of the camera.7
SSI (Spectral Similarity Index): The newest metric, SSI, compares the spectral footprint of a light directly to a known standard (like the Sun or a Tungsten bulb). While TLCI predicts camera performance, SSI predicts how well a light matches other sources. This is crucial when mixing artificial lights with window light.8
| Metric | Definition | Target Score for Pro Studio | Relevance |
| CRI | Human perception of color accuracy. | > 96 | General reference, becoming outdated. |
| TLCI | Camera sensor perception of color accuracy. | > 95 | Critical for skin tones in video. |
| SSI | Spectral match to a reference source (e.g., D55). | > 85 | Critical for mixing daylight & LEDs. |
2.3 The Quality of Light: Hard vs. Soft
The “softness” of a light source is determined solely by its apparent size relative to the subject. A 600-watt bare bulb (small source) will create harsh, razor-sharp shadows that accentuate skin texture and blemishes. A 60-watt bulb inside a 5-foot softbox (large source) will create soft, wrapping gradation that smooths skin.9
In a spare room studio, space is the limiting factor for softness. A large modifier (like a 35-inch dome) requires physical volume. If the room is too small for large modifiers, the creator must move the light closer to the subject to increase its relative size, which circles back to the Inverse Square Law trade-offs discussed in Section 2.1.
3. The Illuminator’s Arsenal: Hardware Recommendations (2026)
The market has shifted decisively toward Chip-on-Board (COB) LEDs. Unlike older LED panels which consisted of hundreds of discrete diodes (creating micro-shadows), COB lights act as a single point source. This allows them to be used with Bowens-mount modifiers, offering the versatility of traditional cinema hot lights with the cool running temperature of LEDs.10

3.1 The Key Light: The Foundation
The key light provides the primary exposure and determines the character of the image. For a home studio, a power output of 100W to 200W is the “sweet spot.” While 60W is usable, it often requires the light to be at 100% power (reducing lifespan) or placed dangerously close to the subject. 200W allows the use of heavy diffusion layers while keeping the ISO low for maximum image quality.12
3.1.1 The Market Leader: Aputure Amaran 200x S / 200d S
The “S” series from Aputure represents a massive leap in spectral fidelity for the prosumer market.
- Technical Specifications: The Amaran 200x S (Bi-Color) utilizes a dual-blue LED chipset design to minimize the spectral gap that typically plagues bi-color lights. It achieves an SSI (Tungsten) of 90 and SSI (D56) of 89, numbers previously reserved for lights costing ten times as much.12
- Form Factor: Compact composite body, active cooling (fan), and integrated Bowens mount.
- Application: The 200W output is sufficient to blast through a double-diffused softbox or bounce off a wall for a “book light” setup. The bi-color function allows matching to practical lamps (warm) or window light (cool).
- Recommendation: Aputure Amaran 200x S
3.1.2 The Budget Challenger: Godox SL60II D
For creators strictly budget-constrained, the Godox SL60 has been the standard entry point. The Mark II version addresses the fan noise issues of the original.
- Limitations: At 60W, it struggles if placed further than 4 feet away or if used with thick diffusion grids. It is daylight-balanced (5600K) only, meaning it cannot be warmed up without using gels, which cut light output further.13
- Recommendation: Godox SL60II D
3.1.3 The Mid-Range Workhorse: Godox VL150
Often cited as a robust alternative to more expensive Aputure units, the VL150 separates the controller and battery plate from the light head.
- Advantage: This weight redistribution makes it safer to boom arm over a desk. It is known for whisper-quiet fans, making it ideal for small rooms where the microphone is close to the lights.15
- Recommendation: Godox VL150
3.2 Light Modifiers: Shaping the Source
A COB light is useless without a modifier. The modifier dictates the beam angle and softness.
3.2.1 Parabolic Softboxes
The industry standard for talking heads. The parabolic shape focuses the light more efficiently than a standard square softbox, throwing light forward while maintaining soft edges.
- Aputure Light Dome II: Features a quick-release speed ring that sets up in seconds. It includes two layers of diffusion (1.5 stop and 2.5 stop) and a gel holder.12
- Aputure Light Dome SE: A lighter, cheaper version. It uses flexible rods that must be manually inserted, making setup slower, but the quality of light is identical. Ideal for permanent setups.17
- Recommendation: Aputure Light Dome II
3.2.2 The Necessity of Grids (Honeycombs)
In a small spare room, light spill is the enemy. When light spills onto the walls, it reduces the contrast ratio, making the image look “flat.”
- Function: A fabric grid (egg crate) attaches to the front of the softbox. It restricts the beam angle (usually to 45 degrees), directing light only onto the subject and preventing it from hitting the background wall. This is essential for achieving the moody “YouTuber” look.17
3.2.3 Lanterns: The Omni-Directional Alternative
Lantern modifiers (like the Aputure Lantern) emit light in 270 degrees.
- Use Case: Excellent for roundtable discussions or when a “high key” (bright, airy) look is desired.
- Drawback: In a small room, a lantern raises the ambient light level of the entire space, reducing contrast. It is generally not recommended for the dramatic, moody lighting preferred by tech reviewers.11

4. Architectural Lighting Layouts: Beyond Three-Point Lighting
While the “Three-Point Lighting” setup is the academic standard, modern YouTube aesthetics often employ variations that prioritize mood and depth.
4.1 The Contemporary Three-Point Setup
4.1.1 The Key Light (Placement & Angle)
Positioned at a 45-degree angle from the camera-subject axis and elevated 45 degrees above the subject’s eyeline.
- The “Rembrandt” Patch: Ideally, the key light should cast a shadow from the nose that connects with the shadow on the cheek, creating a small triangle of light on the shadowed cheek. This adds significant dimensionality to the face.9
- Catchlights: The height of the key light is critical. If too high, the eyes fall into shadow (raccoon eyes). If too low, it creates unnatural “campfire” lighting. The reflection of the softbox (catchlight) should appear in the upper portion of the iris (10 o’clock or 2 o’clock position), which makes the eyes look alive.12
4.1.2 The Fill Light (or Negative Fill)
Traditionally, a fill light is placed opposite the key to lift shadows.
- Modern Trend: Many creators now prefer Negative Fill. Instead of adding light, a black board (V-flat) is placed on the shadow side to absorb reflected light. This deepens the shadows, increasing the lighting ratio (contrast) and creating a more masculine, dramatic look often seen in tech and cinematic content.19
- Ratio Guide:
- 2:1 Ratio: Key is 1 stop brighter than fill. (News/Corporate).
- 4:1 Ratio: Key is 2 stops brighter than fill. (Cinematic/Interview).
- 8:1 Ratio: Deep contrast. (Dramatic/Noir).20
4.1.3 The Rim / Hair Light
Placed behind the subject, usually opposite the key light. This light strikes the shoulder and hair, creating a bright outline that separates the subject from the background.
- Color Contrast: A popular technique is to set the rim light to a different color temperature than the key. If the key is 5600K (Daylight), a 3200K (Warm) rim light creates a golden edge, mimicking sunlight.21
4.2 Background and Motivated Lighting (Practicals)
Lighting the background is as important as lighting the subject. A dark subject against a dark background disappears (the “floating head” effect).
- Practicals: Lights that are visible in the shot, such as the Philips Hue Signe or Govee Lyra. These serve as set dressing and provide a “motivation” for the light in the scene.12
- Tube Lights: RGB tube lights (e.g., Amaran T2c) can be hidden behind furniture or shelves to cast a glow on the wall. This creates depth cues and allows the creator to brand their channel with specific colors (e.g., teal/orange palette).10
- Recommendation: Amaran T2c
4.3 Common Lighting Mistakes
- Over-lighting: Beginners often blast the subject with 100% power, causing squinting and flat skin. It is better to dim the light and open the camera aperture (lower f-stop) to achieve exposure.23
- Mixed Color Temperatures: Allowing blue daylight (5600K) from a window to mix with warm room lamps (3200K) creates a “muddy” white balance that is impossible to correct in post-production. Best Practice: Block out all natural light (blackout curtains) to have 100% control, or match your LEDs to the window light.24
- Eyeglass Glare: A common issue. The angle of incidence equals the angle of reflection. To fix this, raise the key light higher and angle it down steeply. The reflection will bounce off the glasses and travel downward (towards the floor) rather than straight back into the camera lens.21
5. Part II: Audio Engineering – The Signal Chain
Audio quality is the single most significant predictor of audience retention. Viewers will tolerate grainy 1080p video, but they will click away instantly from distorted, reverberant, or quiet audio. In a spare room environment, the challenge is rarely the microphone’s quality, but the room’s acoustics.
5.1 The Transducer Choice: Dynamic vs. Condenser
The most fundamental decision in studio audio is the microphone type. This choice is dictated by the acoustic environment.
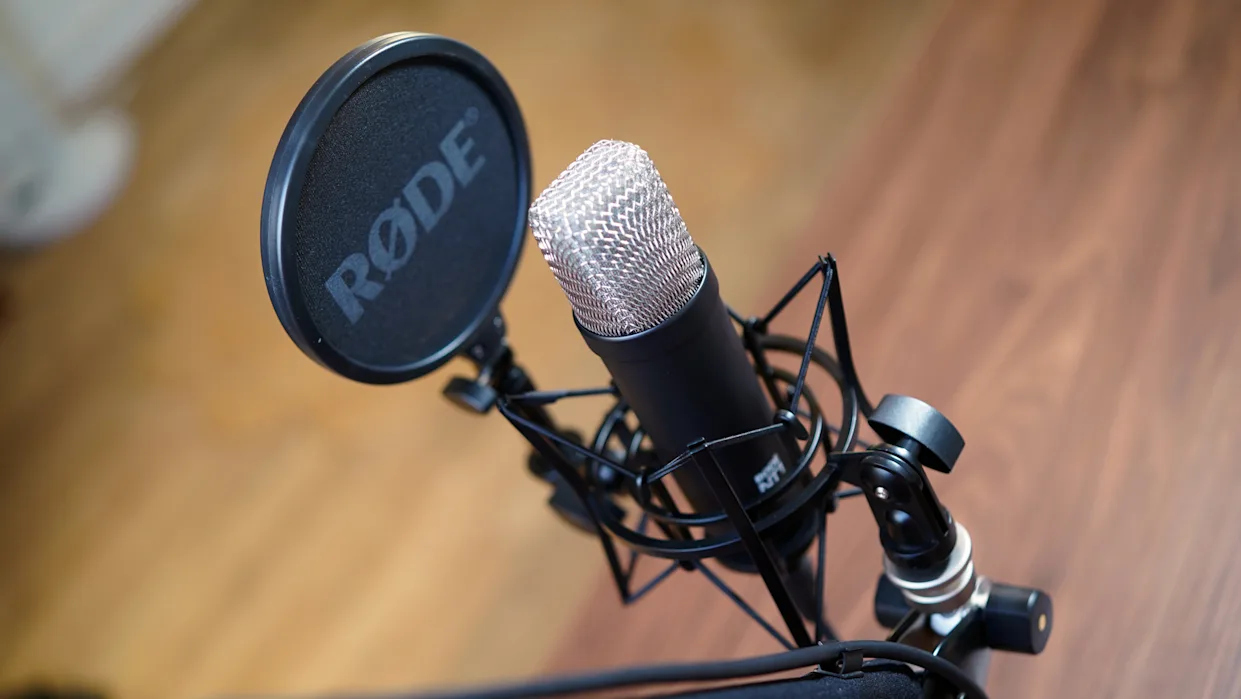
5.1.1 The Condenser Microphone (e.g., Rode NT1, AT2020)
Condenser microphones use a lightweight diaphragm suspended by a fixed plate. They are highly sensitive and require Phantom Power (+48V).
- Pros: Incredible high-frequency detail; captures the “air” and nuance of the voice.
- Cons (for spare rooms): Their high sensitivity means they capture everything—computer fans, traffic outside, and most importantly, the room reverb. In an untreated room, a condenser mic will sound distant and “echoey”.25
5.1.2 The Dynamic Microphone (e.g., Shure SM7B, PodMic)
Dynamic microphones use a moving coil attached to a diaphragm. They are heavy, less sensitive, and passive.
- Pros: Excellent off-axis rejection. They naturally ignore distant sounds (reverb, fans) and focus on the source directly in front of the capsule. This creates the “radio voice” sound—dry, intimate, and bass-heavy (due to the proximity effect).
- Cons: Low sensitivity means they require substantial gain from the preamp.26
- Verdict: For 95% of home studios, a Dynamic Microphone is the superior choice because it masks the imperfections of the room.
5.2 The Gold Standard Microphones (2025)
5.2.1 The Industry Icon: Shure SM7B
The SM7B is ubiquitous in podcasting and YouTube for a reason. Its frequency response is tailored for the human voice, with a bass roll-off and mid-range presence boost controls. Its internal air suspension shock isolation virtually eliminates mechanical noise transmission.
- Requirement: It is gain-hungry (-59dB sensitivity). You will need a high-quality interface or an inline activator (like a Cloudlifter) to drive it without introducing hiss.
- Recommendation: Shure SM7B
5.2.2 The Modern Hybrid: Shure MV7+
The MV7+ is designed specifically for the digital creator. It features both XLR and USB-C outputs.
- DSP Features: When used via USB, it offers a “Auto Level Mode” which actively adjusts gain in real-time, acting as a virtual audio engineer. It also includes a digital “popper stopper” to reduce plosives.
- Advantage: It delivers 85-90% of the SM7B’s sound quality at a lower price point and eliminates the need for an external audio interface, making it the ultimate “efficiency” choice.27
- Recommendation: Shure MV7+
5.2.3 The Shotgun Microphone Dilemma
Shotgun mics (e.g., Sennheiser MKH 416) use an interference tube to cancel sound from the sides.
- The Indoor Risk: Shotguns are designed for outdoors. In small rooms, sound waves bounce off walls and enter the interference tube phase-shifted. This causes “comb filtering,” resulting in a hollow, metallic sound.
- The Alternative: For booming a mic out of frame indoors, a Super-Cardioid Pencil Condenser (like the Sennheiser MKH 50 or Audio-Technica AT4053b) is preferred over a shotgun, as it rejects side noise without the interference tube artifacts.29
- Budget Shotgun Pick (if necessary): Sennheiser MKE 600 Shotgun Microphone (Handling indoor reflections better than most entry-level shotguns).
5.3 The Interface: Preamp Quality and Gain
If using an XLR microphone, the Analog-to-Digital (A/D) converter is the bridge to the computer.
5.3.1 Focusrite Scarlett 2i2 (4th Gen)
The 4th Generation Scarlett represents a significant upgrade. It now offers 69dB of gain, which is enough to power a Shure SM7B without a Cloudlifter. This simplifies the signal chain and reduces cost. It also features “Air Mode,” which adds an analog high-frequency boost to mimic high-end ISA preamps.30
- Recommendation: Focusrite Scarlett 2i2 (4th Gen)
5.3.2 Audient EVO 4
Ideal for solo creators, the EVO 4 features Smartgain. The user presses a button, talks into the mic, and the interface automatically sets the gain level to the optimal point (peaking around -12dB). This prevents clipping (distortion) without trial and error.30
- Recommendation: Audient EVO 4
6. Part III: Acoustic Control – Taming the Room
Acoustics is the dark art of studio design. Most creators confuse “soundproofing” with “acoustic treatment.”
- Soundproofing (Isolation): Preventing sound from entering or leaving the room. This requires mass and decoupling (e.g., double layers of drywall, Green Glue, airtight seals). It requires construction.
- Acoustic Treatment (Control): Managing how sound behaves inside the room. This involves Absorption (reducing reverb) and Diffusion (scattering reflections). This is what we focus on for a spare room studio.31
6.1 The “Egg Crate Foam” Fallacy
One of the most pervasive myths is that cheap, lightweight foam wedges (often sold in vacuum packs on Amazon) will treat a room.
- The Physics: Sound absorption efficiency is determined by the density and depth of the material relative to the wavelength of the sound. Low-frequency waves (bass/baritone voice) have long wavelengths (several feet). Thin, low-density foam (1-inch deep) is physically incapable of absorbing these waves.
- The Result: Cheap foam absorbs only high frequencies (treble). This leaves the mid-range and bass bouncing around the room, resulting in a room that sounds “muddy,” “boxy,” and unbalanced.32
6.2 High-Density Absorption: The Real Solution
Professional treatment uses high-density materials like rigid fiberglass (Owens Corning 703) or mineral wool (Rockwool).
6.2.1 Broadband Panels
These are typically 2-4 inches thick and covered in breathable fabric. They absorb a wide frequency spectrum, from high treble down to the low-mids (approx. 250Hz).
- Placement Strategy (The Mirror Trick): To find where to place panels, sit in your recording chair. Have a friend slide a mirror along the side walls. Anywhere you can see the reflection of your speakers (or your own mouth), place a panel. These are the “First Reflection Points,” and treating them yields the highest ROI for clarity.31
6.2.2 Bass Traps
Low-frequency energy naturally accumulates in corners due to the geometry of room modes. “Bass buildup” causes some notes in your voice to boom resonantly while others disappear (cancellation).
- Solution: Place thick, high-density absorbers in the corners of the room. A common DIY method is stacking packs of Rockwool Safe’n’Sound in the corners, floor to ceiling.
- Commercial Solution: Primacoustic London Bass Traps are engineered specifically for this purpose and offer a cleaner aesthetic.34
6.3 Recommended Acoustic Kits
For a “done-for-you” solution that guarantees results:
- Primacoustic London 12 Room Kit: This kit provides a balanced mix of broadband panels (for walls) and scatter blocks (for diffusion). Unlike cheap foam, these panels are based on high-density glass wool, providing legitimate absorption down to the lower mid-range frequencies.
- Recommendation: London 12 Room Kit
6.4 The “Renter’s Hack”: Sound Blankets
If you cannot glue or drill into walls, Moving Blankets are the best alternative. However, not all blankets are equal.
- Producer’s Choice Blankets: These are heavy, grommeted blankets designed for sound absorption. Hanging them in a V-shape behind the creator (using C-stands) creates a “portable vocal booth” that drastically dries up the audio, even in a terrible room.35
- Recommendation: Moving Blankets
7. Part IV: Grip, Rigging, and Logistics
“Grip” refers to the support equipment—stands, clamps, and arms. In a small room, efficient grip is crucial to maximize floor space and safety.
7.1 The C-Stand (Century Stand)
The standard light stand (tripod style) typically has a wide footprint and cannot boom a light over a desk without the legs getting in the shot.
- The C-Stand Advantage: A C-stand uses a “turtle base” with staggered legs that can slide under furniture. Crucially, it includes a Gobo Arm (boom arm) and Grip Head. This allows you to cantilever the key light overthe subject’s head while the stand remains safely out of frame.
- Safety: Always place a sandbag on the tallest leg of the C-stand to prevent tipping. When tightening the grip head, ensure the weight of the light is on the right side (righty-tighty), so if the arm slips, gravity tightens the knob rather than loosening it.36
- Recommendation: Neweer C Stand (A cost-effective steel clone of the industry-standard Matthews stand).
7.2 Microphone Arms and Positioning
Getting the microphone off the desk serves two purposes:
- Decoupling: It prevents vibrations (typing, bumping the desk) from traveling up the stand and into the mic.
- Visuals: It allows the mic to float in the perfect position (3-6 inches from mouth) without a bulky stand obscuring the shot.
- Rode PSA1+: The gold standard for heavy mics like the SM7B. It uses internal springs for silent operation and holds position perfectly.38
- Recommendation: Rode PSA1
- Elgato Wave Mic Arm LP (Low Profile): A modern favorite. The arm runs under the computer monitor and reaches up to the mouth. This keeps the arm completely out of the camera shot and maintains a clear line of sight to the screen.39
- Recommendation: Elgato Wave Mic Arm
7.3 Cable Management: The Mental Game
A cluttered floor leads to a cluttered mind. In a small studio, cable management is a safety requirement.
- Velcro Ties: Use velcro (hook and loop) ties to secure cables to the C-stand arms. Never use zip ties on cables, as they can pinch the internal wiring and are difficult to remove.
- Labels: Label both ends of every cable (e.g., “Key Light,” “Cam 1 USB,” “Mic Preamp”). When a tech issue occurs 5 minutes before a livestream, knowing which cable is which saves panic.40

8. Part V: Composition and Set Design
The final layer of the professional studio is the visual arrangement of the space.
8.1 Depth and Separation
A common amateur mistake is placing the desk flat against a wall. This creates a 2D “mugshot” look.
- The Depth Rule: Pull the desk at least 4-6 feet away from the back wall. This physical distance allows the camera’s depth of field to blur the background (bokeh), creating professional separation. It also allows you to light the wall separately from the subject.1
8.2 Monitor Glare Management
Creators who wear glasses or use teleprompters often struggle with reflection.
- Angle of Incidence: Light reflects at the same angle it hits. If the key light is at face height, it bounces off glasses straight into the lens. Solution: Raise the key light up high and angle it steeply downwards. The reflection will bounce off the glasses and hit the floor, disappearing from the camera’s view.21
- Monitor Tilt: Tilt your computer monitors slightly downward. This ensures that the glass reflects your dark lap or the floor, rather than the bright lights or the camera lens.41
8.3 The Rule of Thirds and Framing
When framing the shot, align the subject’s eyes with the top horizontal line of the Rule of Thirds grid.
- Looking Room: If the subject is angled slightly to the side, leave more space on the side they are looking toward. This creates a subconscious sense of balance and intent.42
9. Comprehensive Gear Lists by Budget
To synthesize these technical recommendations, the following tiers offer optimized pathways for different budget levels.
9.1 Tier 1: The “Smart Entry” (Budget: ~$500)
Focus: High ROI, sacrificing some convenience for performance.
| Category | Product | Reason |
| Light | Godox SL 60 W | Best value 60W COB light. |
| Modifier | Neewer Softbox | Large source for soft light. |
| Audio | samson Q2U | Dynamic mic, USB/XLR hybrid. |
| Stand | Basic Aluminum Light Stand | Included in most softbox kits. |
| Acoustics | Amazon Moving Blankets | Cheap, effective absorption. |
9.2 Tier 2: The “Content Pro” (Budget: ~$1,500)
Focus: The sweet spot for growing channels. Balances performance with workflow.
| Category | Product | Reason |
| Light | Aramad 100D | High spectral fidelity, app control. |
| Modifier | (https://www.amazon.com/s?k=Aputure+Light+Dome+SE&tag=robertsutton-20) | Includes high-quality grid. |
| Audio | (https://www.amazon.com/s?k=Shure+MV7+Plus&tag=robertsutton-20) | DSP features, perfect for untreated rooms. |
| Arm | (https://www.amazon.com/s?k=Elgato+Wave+Mic+Arm+LP&tag=robertsutton-20) | Low profile, clean aesthetic. |
| Backlight | (https://www.amazon.com/s?k=Amaran+T2c&tag=robertsutton-20) | RGB accents and depth. |
9.3 Tier 3: The “Studio Master” (Budget: ~$3,500+)
Focus: Broadcast quality, reliability, and “buy it for life” durability.
| Category | Product | Reason |
| Key Light | (https://www.amazon.com/s?k=Amaran+200x+S&tag=robertsutton-20) | Bi-color, massive output for diffusion. |
| Modifier | (https://www.amazon.com/s?k=Aputure+Light+Dome+II&tag=robertsutton-20) | Rapid deployment, premium diffusion. |
| Grip | (https://www.amazon.com/s?k=Neewer+C-Stand&tag=robertsutton-20) | Booming capability and safety. |
| Mic | (https://www.amazon.com/s?k=Shure+SM7B&tag=robertsutton-20) | The legendary broadcast sound. |
| Interface | (https://www.amazon.com/s?k=Focusrite+Scarlett+2i2+4th+Gen&tag=robertsutton-20) | 69dB gain to drive SM7B. |
| Acoustics | Primacoustic London 12 | Full room frequency control. |
10. Best Practices and Common Mistakes
10.1 Best Practices
- Light the Far Side: Position your key light on the side of the face away from the camera. This “short lighting” creates more shadow on the side of the face visible to the camera, which is slimming and cinematic.18
- Gain Staging: Aim for your audio peaks to hit between -12dB and -6dB on your digital meters. This provides a safety buffer (headroom) against clipping if you laugh or shout.
- Eye Contact: Position the camera lens at eye level or slightly below. Looking down at a camera feels superior/condescending; looking up feels submissive. Eye level is conversational.
10.2 Common Mistakes
- Relying on Post-Production: “I’ll fix it in post” is the death of efficiency. You cannot fix bad lighting ratios or remove room echo easily. Spend the time to get it right in-camera.
- Ignoring Power Safety: Plugging 1000W of lights and computers into a single cheap power strip is a fire hazard. Calculate the amperage of your gear (Watts / Volts = Amps) and ensure your circuit breaker can handle the load. Use high-quality surge protectors.
- Flat Lighting: Using a ring light or placing a light directly beside the camera lens washes out all shadows. Without shadows, there is no depth. Embrace the shadows.
11. Frequently Asked Questions (FAQ)
Q: Can I use a Ring Light instead of a Softbox? A: Ring lights are designed for a specific “beauty” look that eliminates skin texture and creates a halo catchlight. For general YouTube content, they often look amateurish and flat. A softbox positioned at 45 degrees provides better facial modeling and a more professional aesthetic.11
Q: Do I really need a hair light / rim light?
A: While not strictly mandatory, a hair light is the most effective way to increase perceived production value. It separates you from the background, preventing the 2D “cardboard cutout” look, especially if you have dark hair and a dark background.
Q: My room is tiny (e.g., 8×8 feet). How do I light it without spilling everywhere?
A: This is where Grids (Honeycombs) are essential. Put a grid on your softbox to narrow the beam. Place the light as close to you as possible (utilizing the Inverse Square Law) so the light falls off before it hits the back wall. Use a dynamic microphone (like the Shure MV7+) to reject the immediate wall reflections.
Q: Does acoustic foam soundproof my room from street noise? A: No. Acoustic foam treats echo (internal reflections). It has zero effect on sound transmission. To stop street noise, you need mass (thick windows, heavy curtains) and air-tight seals. Do not buy foam expecting it to silence a noisy neighbor.43
Q: What is the best camera setting for this lighting?
A: Lock your Shutter Speed to double your frame rate (e.g., 1/50th for 24fps). Set your ISO to the camera’s “Native ISO” (usually ISO 400, 640, or 800) to minimize noise. Then, adjust the brightness of your lights to get the correct exposure. Do not change camera settings to fix lighting; change the lighting to suit the camera.
Looking to travel with your gear? Check out this photography gear travel guide from GearUpTravel.com.
